
Have you ever thought about growing your very own prickly pear cactus? It’s a pretty neat idea, isn't it? These amazing plants, known for their unique look and tasty fruit, are surprisingly simple to get started right in your own garden or even a pot. Prickly pear propagation is, in a way, a truly rewarding project for anyone who loves plants, whether you're just starting out or you've been gardening for ages.
The prickly pear, as my text points out, is quite distinctive. It's "full of or covered with prickles," which sets it apart from other similar plants. This term "prickly" generally refers to something covered in sharp, pointed spikes or thorns, so you know what you're dealing with. But don't let that put you off! These plants are incredibly tough, thriving in desert areas, including places like Mexico and the Southwest, as my text mentions. They’re also "not to be confused with the pear," the common fruit you find in the grocery store, which is an important thing to remember.
So, if you're keen to add a bit of desert charm to your space, or maybe you're interested in harvesting those "small, oval fruit that grows on the paddles," learning about prickly pear propagation is definitely the way to go. This guide will walk you through each step, making it easy to understand and follow, so you can soon have your own thriving prickly pear patch. It's actually quite a straightforward process, you know.
Table of Contents
- What Makes Prickly Pear So Special?
- Getting Started with Prickly Pear Propagation
- Caring for Your New Prickly Pear Plants
- Troubleshooting Common Prickly Pear Propagation Issues
- When to Expect Fruit (and How to Enjoy It)
- Frequently Asked Questions About Prickly Pear Propagation
What Makes Prickly Pear So Special?
Prickly pear plants, or nopal cacti, are quite remarkable. They're known for their flat, paddle-like stems, which are actually modified stems that do the work of leaves. My text clearly states that "the meaning of prickly is full of or covered with prickles," which is certainly true for these plants. They are "distinguished from related kinds by the presence of prickles," making them truly unique in the plant world. You might think, "Well, that sounds a bit rough," and in a way, it does. My text also mentions that "something that is prickly feels rough and uncomfortable, as if it has a lot of prickles," like the example of "the grass was prickly and cold."
Beyond their distinctive appearance, these plants are incredibly resilient. They can handle tough conditions, which is why they do so well in desert regions. But there's more to them than just their tough exterior. These plants produce a fruit, too. My text mentions, "find out how to eat prickly pear, a small, oval fruit that grows on the paddles." This fruit is often called a "tuna" and is quite popular in many cultures for its sweet, slightly tangy taste. So, growing your own means you could potentially enjoy fresh, homegrown fruit, which is a pretty cool benefit, you know.
Moreover, the paddles themselves are edible when prepared correctly. They're a staple in some cuisines, adding a unique flavor and texture to dishes. This plant's ability to thrive in dry areas, provide food, and offer a striking visual presence makes it a truly special addition to any garden. It’s a very adaptable plant, actually, making it a good choice for many different climates, provided it gets enough sun.
Getting Started with Prickly Pear Propagation
Beginning your prickly pear propagation journey is actually simpler than you might think. The most common and successful method involves using a piece of the plant, often called a "pad" or "cutting." This way, you don't need to worry about seeds, which can take a much longer time and have lower success rates. It's a pretty efficient way to get new plants, honestly.
Choosing Your Cuttings
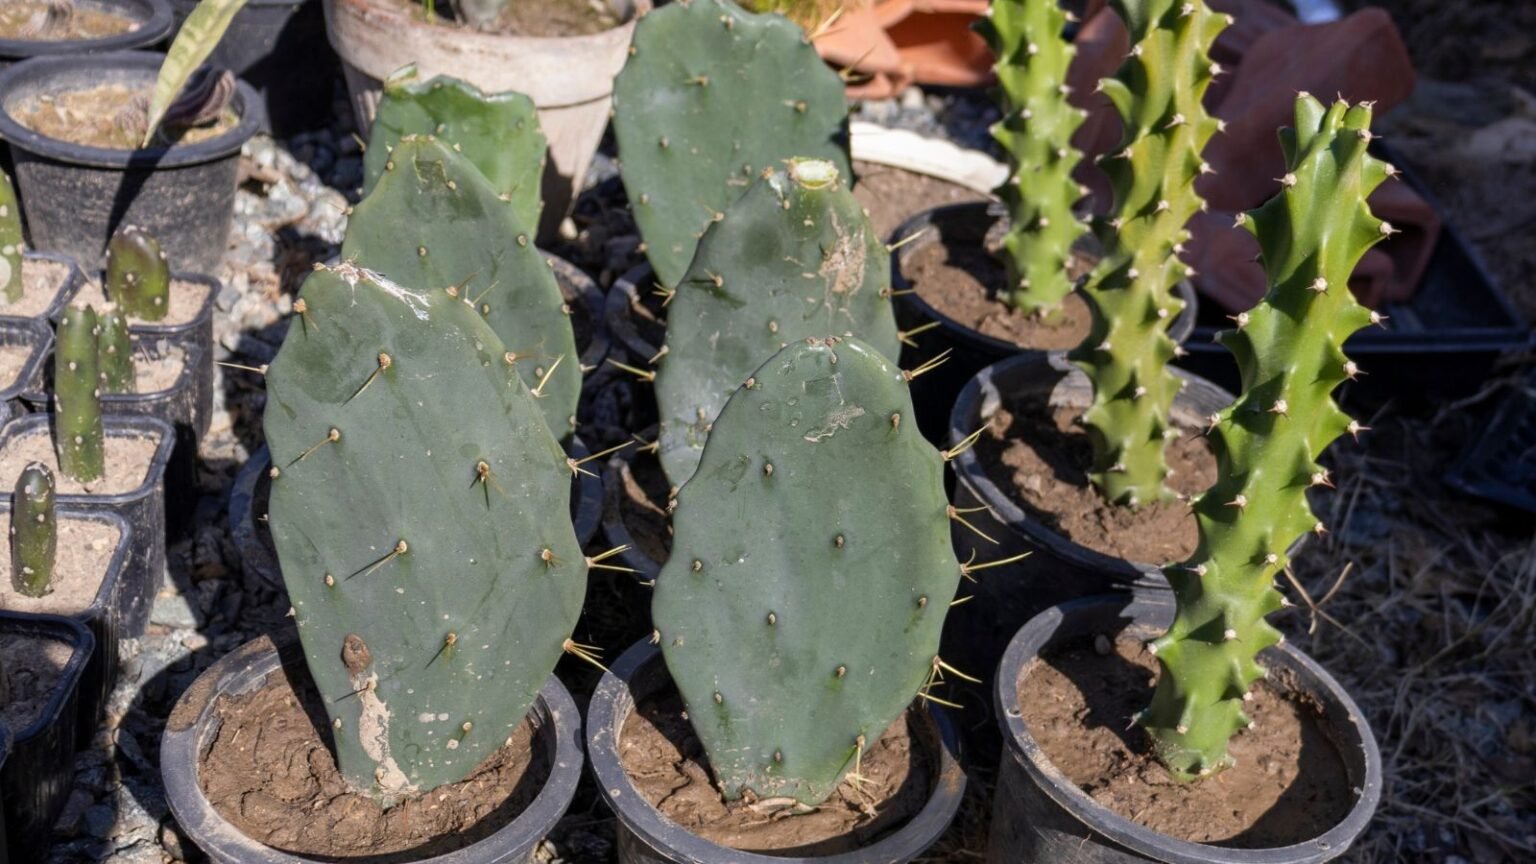
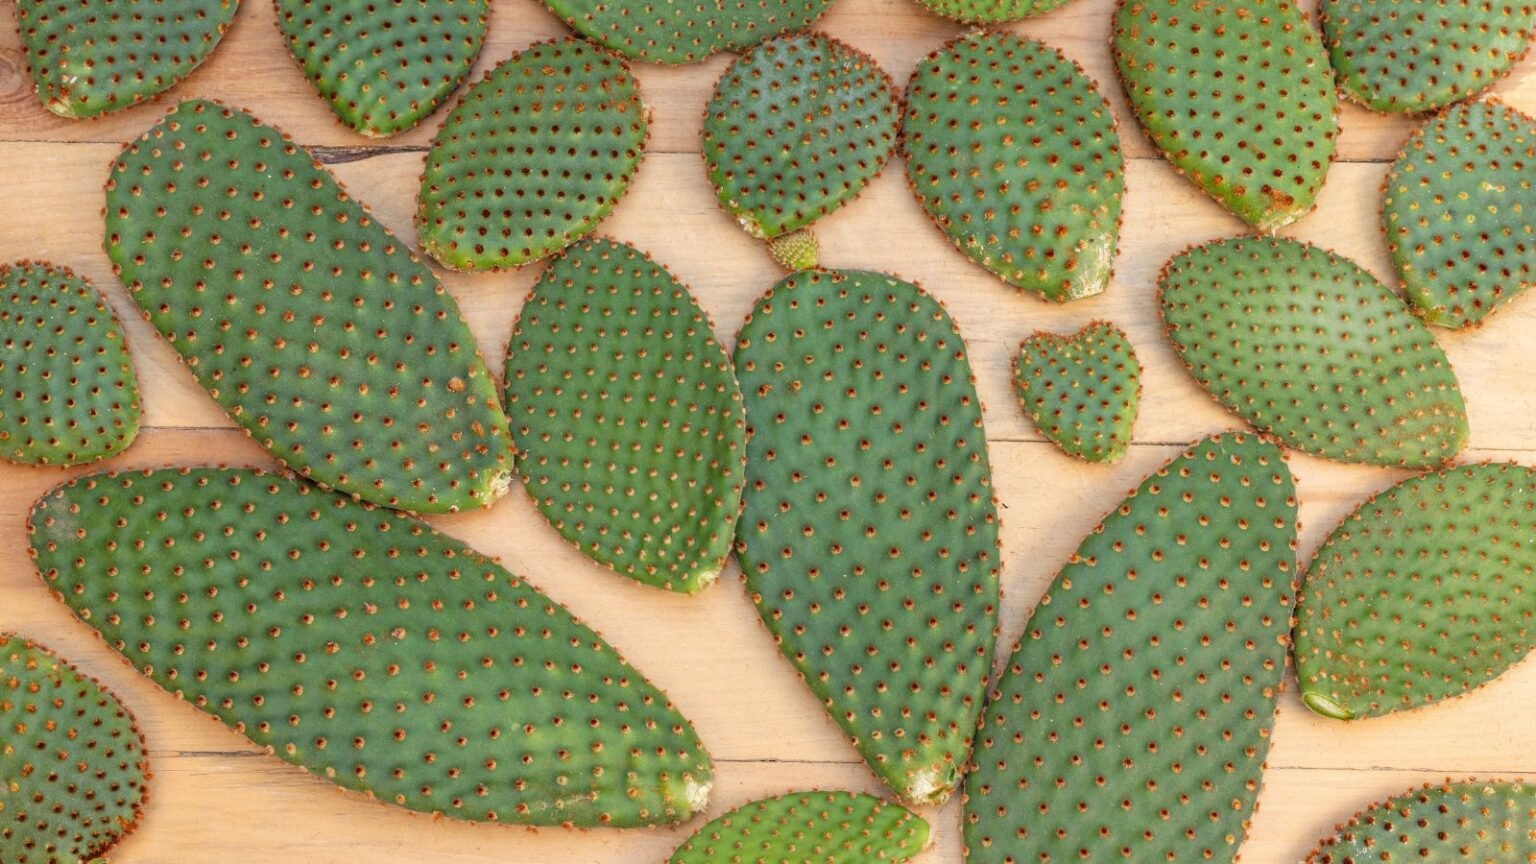
Selecting the right pad is a crucial first step for successful prickly pear propagation. You want a healthy, mature pad that looks green and plump, without any signs of disease or damage. A good size is typically one that's about six to twelve inches long. When you take the cutting, use a clean, sharp knife or a pair of garden shears. Make a clean cut where the pad joins another pad or the main stem. It’s important to be careful because, as my text reminds us, the plant is "full of or armed with prickles." Using thick gloves and maybe even tongs can help you avoid those uncomfortable sharp points. You know, safety first!
Once you have your chosen pad, handle it gently. You're looking for one that has a good, solid feel to it, not soft or mushy. The cleaner the cut, the better, as this helps prevent problems later on. You might find that some older pads have a tougher, woodier base, which can still work, but younger, firmer pads often root more readily. Just be sure it’s a good, strong piece, basically.
Preparing the Pads for Planting
After you've taken your cutting, the next very important step in prickly pear propagation is to let it "callus." This means allowing the cut end to dry out and form a protective layer, almost like a scab. This layer helps prevent rot once you plant the pad in soil. Place the pad in a dry, shaded spot with good air circulation. You can lean it against a wall or lay it flat. This process typically takes anywhere from a few days to two weeks, depending on the size of the pad and the humidity in your area. You'll know it's ready when the cut surface feels dry and firm, perhaps even a bit leathery. It's kind of like letting a wound heal before putting a bandage on it.
During this callusing period, resist the urge to plant it right away. Patience is a real virtue here. If you plant a fresh cutting, it's very likely to rot, especially if the soil is even slightly damp. A well-callused pad has a much higher chance of success, which is what we're aiming for. So, just let it sit there for a bit, doing its thing, you know.
The Right Potting Mix and Container
For successful prickly pear propagation, the type of soil you use is incredibly important. These plants need excellent drainage to prevent their roots, or what will become roots, from sitting in soggy conditions. A good succulent or cactus potting mix is ideal. You can also make your own by mixing regular potting soil with coarse sand, perlite, or pumice in about a 1:1 ratio. This helps create a very well-draining environment. The bunk mattress in my text was "hard, the blankets prickly and slightly damp," and we definitely don't want damp conditions for our prickly pear roots!
When it comes to containers, choose one that has drainage holes at the bottom – this is absolutely non-negotiable. A terracotta pot is often a good choice because it's porous and allows excess moisture to evaporate, further helping with drainage. The size of the pot should be appropriate for the pad you're planting; a pot that's too big can hold too much moisture. Something that gives the pad a bit of room, but not too much, is generally perfect, you know.
Planting Your Prickly Pear Cuttings
Once your pad is callused and you have your well-draining soil and suitable pot, it’s time to plant. Place the callused end of the pad about one to two inches deep into the potting mix. You can just gently press it into the soil, making sure it stands upright. If the pad is a bit unstable, you can use rocks or stakes to support it until it develops roots. Don't bury too much of the pad; just enough to keep it steady. It's pretty straightforward, really.
After planting, resist the urge to water immediately. Remember, we want to avoid rot. Wait about a week or even two before giving it its first light watering. This gives the pad a bit more time to settle in and reduces the risk of moisture-related issues. You're essentially letting it get comfortable before introducing water. This initial period of dryness is, like, super important for successful prickly pear propagation, honestly.
Caring for Your New Prickly Pear Plants
Once your prickly pear pads are planted, consistent and appropriate care will help them establish strong root systems. While they are tough plants, they still need some attention, especially in their early stages. Proper care is, in a way, the key to seeing them thrive, you know.
Watering Wisdom
When you do start watering, do it sparingly. Prickly pears are succulents, meaning they store water in their pads. Overwatering is the most common cause of failure in prickly pear propagation. Water deeply but infrequently. Allow the soil to dry out completely between waterings, and then wait a few extra days for good measure. You can check the soil by sticking your finger about an inch or two down. If it feels dry, it might be time for a drink. During cooler months, you'll need to water even less often, perhaps only once a month or even less. It's basically about mimicking their natural desert environment, where rain is scarce but significant when it does happen.
If you see the pads starting to shrivel slightly, that's a sign they might need water. But if they look yellow or mushy, you're probably giving them too much. It's a delicate balance, but once you get the hang of it, it's pretty easy to tell what your plant needs. Just be mindful of how much water you're giving, and when, you know.
Sunlight Requirements
Prickly pears absolutely love the sun. For the best results in prickly pear propagation, place your newly planted pads in a spot where they will receive at least six to eight hours of direct sunlight each day. A south-facing window is great if you're growing indoors, or a sunny spot in your garden outdoors. If they don't get enough light, the pads might become elongated and weak, a condition known as "etiolation." This can make them look a bit stretched out and not as robust. So, really, give them all the sun you possibly can.
While they crave sun, a little protection from the most intense, scorching afternoon sun during extreme heat waves can sometimes be helpful, especially for very young plants. However, generally speaking, the more sun, the better for these desert dwellers. They're built for it, after all. You'll notice they just seem happier in bright light, you know.
Temperature and Location
Prickly pear plants prefer warm temperatures, typically doing best when temperatures are above 70°F (21°C). They are quite tolerant of heat, which makes sense given their origins. However, they can be sensitive to frost. If you live in an area where temperatures drop below freezing in winter, you'll need to protect your outdoor plants or bring potted ones indoors. They're not big fans of the cold, honestly.
When choosing a location, consider both sunlight and temperature. If you're planting directly in the ground, pick a spot that's well-drained and gets plenty of sun. For potted plants, having them on wheels or in a location where they can be easily moved indoors during cold snaps is a good idea. This flexibility helps ensure their survival through different seasons. It's all about finding that right balance, you know.
Patience and Progress
After planting, it takes time for prickly pear pads to root. You might not see any visible changes for several weeks, or even a couple of months. This is completely normal. Resist the urge to pull on the pad to check for roots, as this can damage any new growth. Instead, gently wiggle the pad. If it offers resistance, it's likely forming roots. New growth, like small, fresh pads appearing on the top or sides of the planted pad, is a clear sign of success. This is often the most exciting part of prickly pear propagation, seeing those first signs of life. It’s a very satisfying moment, you know.
The speed of rooting can vary depending on factors like temperature, humidity, and the health of the original cutting. Generally, warmer conditions speed up the process. Just keep providing consistent care, and eventually, your patience will be rewarded with a thriving new plant. It’s kind of like waiting for a slow cooker meal; it takes time, but the result is worth it.
Troubleshooting Common Prickly Pear Propagation Issues
Even with the best intentions, you might run into a few issues during prickly pear propagation. One common problem is rot. This usually happens if the pad wasn't callused properly or if it's been overwatered. If you notice the pad becoming soft, mushy, or discolored at the base, it's probably rotting. In some cases, you might be able to cut away the rotted part, let the healthy portion callus again, and try replanting. It’s a bit of a setback, but often fixable, you know.
Another issue could be a lack of rooting. If weeks or months pass and the pad still feels loose in the soil and shows no signs of new growth, it might not be rooting. This could be due to a poor cutting, incorrect soil, or not enough warmth. You could try moving it to a warmer spot or checking the soil for proper drainage. Sometimes, just leaving it alone for a bit longer in the right conditions is all it needs. It's basically about being a detective and figuring out what's going on.
Pests are less common with prickly pears, especially when they're young, but they can sometimes attract mealybugs or scale insects. If you spot any, you can gently wipe them off with a cotton swab dipped in rubbing alcohol. Keeping your plant healthy and providing good air circulation helps prevent most pest problems. Regular checks are a good idea, just to catch anything early, you know.
When to Expect Fruit (and How to Enjoy It)
After successful prickly pear propagation, you might be wondering when you can expect to enjoy those tasty fruits. It usually takes a few years for a propagated prickly pear plant to mature enough to produce fruit. The exact time can vary depending on the growing conditions, the specific variety of prickly pear, and how well the plant establishes itself. Generally, you might see your first fruits within two to four years. It's a pretty exciting milestone, you know.
The fruits, as my text describes, are "small, oval fruit that grows on the paddles." They change color as they ripen, often turning red, purple, or yellow. When they are ready to harvest, they will easily twist off the pad. Be careful when handling them, as they also have tiny, fine spines called glochids that can be irritating. My text mentions "experts share how to use" them, which usually involves wearing gloves and using tongs to pick them, then carefully removing the glochids before peeling and eating. They are quite delicious, with a sweet, juicy pulp. You can eat them fresh, use them in jams, juices, or even desserts. It's a very versatile fruit, honestly.
Learning how to safely harvest and prepare the fruit is part of the fun. There are many ways to enjoy this unique desert delicacy once your plants start producing. Just remember that patience is key, both in the propagation process and in waiting for the fruit. It's a very rewarding experience, seeing your efforts literally bear fruit, you know. Learn more about prickly pear care on our site, and link to this page for more general information about growing these fascinating plants.
Frequently Asked Questions About Prickly Pear Propagation
Can you grow prickly pear from a cutting?
Yes, absolutely! Growing prickly pear from a cutting, also known as a pad, is the easiest and most successful way to propagate these plants. It's much faster and more reliable than trying to grow them from seeds, which can be a bit tricky and take a very long time. It’s a pretty common method, honestly.
How long does it take for prickly pear cuttings to root?
The rooting process for prickly pear cuttings can vary, but generally, you can expect roots to form within a few weeks to a couple of months. Factors like warmth, humidity, and the health of the cutting play a role. You might not see visible roots, but new growth on the pad is a good sign that roots are developing below the soil. It just takes a little bit of time, you know.
When is the best time to propagate prickly pear?
The best time for prickly pear propagation is during the warmer months, typically late spring to early summer. This is when the plants are actively growing, and the warmer temperatures help speed up the callusing and rooting processes. Propagating during this period increases your chances of success significantly. It’s basically when the conditions are just right for new beginnings.

Detail Author:
- Name : Mylene Schumm
- Username : ludie72
- Email : monroe.batz@jacobi.org
- Birthdate : 1976-02-29
- Address : 440 Barrows Port West Dagmarhaven, NH 40648
- Phone : 1-907-588-9368
- Company : O'Reilly, Kunde and Pagac
- Job : Poultry Cutter
- Bio : Assumenda quia id debitis aut ea in. Ut assumenda sint quia eos ipsam eius. Et reprehenderit voluptas aut et et nesciunt. Enim saepe minima recusandae vel quis et.
Socials
tiktok:
- url : https://tiktok.com/@cwiza
- username : cwiza
- bio : Ex voluptas enim magnam velit vel optio quia.
- followers : 5319
- following : 1811
facebook:
- url : https://facebook.com/cwiza
- username : cwiza
- bio : Sed quia ea animi neque.
- followers : 338
- following : 2901
linkedin:
- url : https://linkedin.com/in/charlie_wiza
- username : charlie_wiza
- bio : Rem est aut a pariatur quibusdam dolorem autem.
- followers : 4413
- following : 1572
