
Dealing with a lice infestation is, quite honestly, a very stressful experience for anyone. After you’ve painstakingly removed those tiny pests and their eggs from hair, the last thing you want is to get them back. That feeling of dread, knowing they might still be lurking somewhere, can be pretty overwhelming. You just want them gone for good, and that includes making sure your personal items are clean, too.
Yet, while getting rid of lice from a person's head can be a big job, cleaning your hair tools, like brushes, isn't that difficult. It's actually a much simpler process than you might imagine. A little bit of effort here can make a huge difference in preventing a new infestation, which is something we all want to avoid, really.
This guide will walk you through clear steps on how to clean your hairbrushes after lice have been present. Following these suggestions can help to sanitize your hair brushes and keep lice away, ensuring peace of mind for you and your family. It's about being thorough, you know, and making sure every possible hiding spot for these tiny creatures is addressed.
Table of Contents
- Why Cleaning Your Brushes Matters So Much
- Understanding "Sanitize" for Lice Removal
- Simple Steps to Sanitize Your Hair Brushes After Lice
- Keeping Lice Away: Regular Brush Care
- Frequently Asked Questions About Lice and Brushes
Why Cleaning Your Brushes Matters So Much
It's very important to remember to clean your brushes regularly, as lice can live for up to 48 hours off a person's head. That's a full two days where a stray louse or even a tiny nit could be clinging to a brush bristle, just waiting for a new host. This means that even after you've treated someone's head, there's still a chance of re-infestation if you don't take care of the items they used.
A hairbrush, you see, is a perfect little vehicle for these pests. They can get tangled in the hair strands caught in the brush, or just hold on to the bristles themselves. So, to really break the cycle and ensure lice are truly gone, cleaning every item that has touched the infested hair is a critical step, honestly.
This simple act of cleaning brushes is a free way to get rid of any lice that may be lingering. It helps make sure all your hard work treating the hair isn't undone by an oversight. A bit of effort here saves a lot of trouble later, which is always a good thing, right?
Understanding "Sanitize" for Lice Removal
When we talk about cleaning brushes after lice, the word "sanitize" comes up a lot. The meaning of sanitize is to reduce or eliminate pathogenic agents, like bacteria, on the surfaces of something. It means to make something sanitary, either by cleaning it or disinfecting it, or sometimes both. Sanitizing reduces the level of germs and bacteria on a surface to a safe level, by either removing them or, in some cases, killing them, too.
To be classified as a sanitizer, a product needs to meet certain standards. Sanitizing reduces germs to levels public health codes or regulations consider safe. This process could be done with weaker bleach solutions or special sanitizing sprays. So, sanitizing means you are lowering the number of germs to a safe level, which is determined by public health standards, actually.
Sanitizing a surface often has three steps. Each of these steps plays an important role in killing germs and keeping people safe. It’s a process, you know, not just a single action. There's a common misconception that you can just apply something and it's done. Sanitize generally means to make something clean and free from bacteria or other harmful substances. This can apply to physical objects, like sanitizing your hands or a surface, or even in other contexts, in a way.
Sanitize vs. Disinfect: What's the Difference?
When it comes to cleaning, the words sanitize and disinfect are often used interchangeably. But, in actuality, there's a significant difference between the two terms. It's important to understand this distinction, especially when dealing with something like lice, so you know exactly what you're trying to achieve, you know.
The main difference is that sanitizing reduces the number of germs to safe levels as determined by public health standards, while disinfecting aims to kill nearly all germs on a surface. Disinfecting uses stronger chemicals and is meant to destroy a wider range of microorganisms. Sanitizing, on the other hand, just reduces bacteria on the surface to a safe level.
Sanitizing is typically recommended for food contact surfaces, for example, as the chemicals used are in concentrations that are considered safe for that kind of environment. For lice, our goal is to eliminate them and their eggs, so while we are "sanitizing" the brush, the methods we use are often effective enough to kill these particular pests, which is what matters most, really.
Simple Steps to Sanitize Your Hair Brushes After Lice
Cleaning hair brushes after a head lice infestation doesn't have to be a complicated task. There are a few very simple steps you can follow to make sure your brushes are free from any lingering lice or nits. This process is quite effective in killing lice and their eggs, making your brushes safe to use again, which is pretty reassuring, honestly.
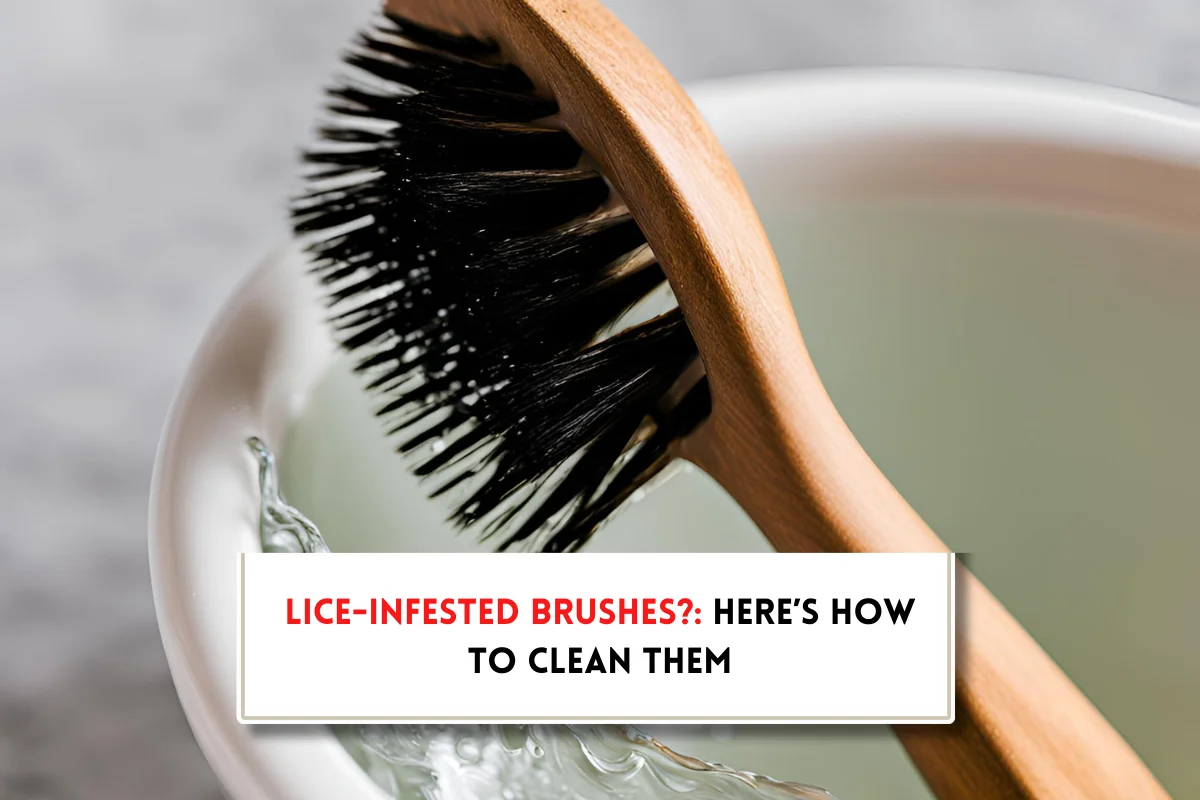
For an effective way to clean hairbrushes after lice, the wet cleaning method works best. This approach involves soaking your hairbrushes in a hot water and dish soap solution. This combination helps loosen any lice and nits, making them easier to remove and ensuring they are no longer viable. It's a method that's been proven to work, you know, and it's something you can do at home with common supplies.
Step 1: Clear Away Loose Hair
The first step in cleaning hair brushes and combs after a head lice infestation is removing all the hair strands. This is a very important initial move because lice and nits can cling to these strands, and if you don't get rid of them, they might survive the cleaning process. It's like clearing the decks before you start the main cleaning job, in a way.
To do this process effectively, you can use a nit comb, which is specifically designed for removing tiny particles, or even an old toothbrush. A nit comb, with its very fine teeth, is great for getting into those tight spaces between the bristles. An old toothbrush, similarly, can help you scrub out any stubborn bits of hair or debris that are stuck deep down, too.
Make sure to be thorough, really. Go over every part of the brush. You want to see the bristles completely free of any hair before moving on to the next step. This prepares the brush for a proper sanitizing soak, ensuring maximum effectiveness, which is what we are aiming for, of course.
Step 2: The Hot Water Soak Method
Soaking your hairbrushes in hot water can kill lice and nits effectively. This is a simple, free way to get rid of any lice that may be lingering on your hairbrush. The heat is what does the work here, as lice and their eggs are very sensitive to high temperatures. It's a straightforward approach that yields good results, honestly.
Here’s how to do it: First, fill the sink with water. The key is the temperature of the water. You must use water that’s at least 130°F (54°C). This temperature is hot enough to kill both adult lice and their eggs, or nits. It's a critical point, because water that's not hot enough simply won't do the job properly, you know.
Carefully place your hairbrushes into this very hot water. Make sure they are fully submerged, bristles and all. You want every part of the brush that could have come into contact with lice to be exposed to the heat. This helps ensure no little buggers escape the process, which is the whole point, right?
Let the brushes soak for at least 5 to 10 minutes. This duration gives the heat enough time to penetrate and kill any lice or nits that might be present. For plastic brushes, this method is usually fine. For brushes with natural bristles or wooden handles, you might want to check the manufacturer's instructions, just to be safe, as some materials might not handle extreme heat as well. This simple method is effective in killing lice and nits, making your brushes safe again.
Step 3: Add a Little Soap Power
While the hot water does most of the heavy lifting, adding a bit of dish soap can really boost the cleaning process. Hairbrushes are soaked in a hot water and dish soap solution to help loosen any lice and nits that might be clinging on. The soap acts as a degreaser and helps break down any oils or residues that could be providing a hiding spot for the pests, you see.
After you've filled your sink with the hot water, squirt in a good amount of regular dish soap. You don't need anything fancy, just your everyday liquid dish soap will do the trick. Swish the water around a little to create some suds before you put the brushes in. This helps distribute the soap evenly throughout the water, which is pretty important.
Once the brushes are submerged in the soapy hot water, you can gently agitate them a bit. This means moving them around in the water, maybe even scrubbing them lightly with an old toothbrush if you see any stubborn bits. The soap helps to make the surface of the brush more slippery, making it harder for lice and nits to hold on, and easier for them to be washed away, too.
Step 4: Rinse and Dry Properly
After the hot water and soap soak, the next crucial step is to rinse your brushes thoroughly with warm water. This gets rid of any remaining soap residue, as well as any dead lice or nits that might still be clinging to the bristles. A good rinse ensures your brushes are clean and ready for use, honestly.
Hold each brush under running warm water, making sure to flush out all the suds. You might need to use your fingers or a clean cloth to gently rub the bristles and ensure all the soap is gone. You want them to feel clean, not slimy or soapy. This step is pretty important for hygiene, you know.
Once rinsed, it’s important to let your brushes dry completely. You can shake off excess water and then lay them flat on a clean towel, or hang them bristles-down if your brush has a hole for hanging. Air drying is usually best. Make sure they are in a well-ventilated area to prevent mildew or mold from forming, which is something you definitely don't want.
Allowing the brushes to air dry fully also helps ensure any remaining moisture doesn't create an environment where new germs could grow. This simple, two-part method of rinsing and drying properly ensures your brushes are not only free of lice but also ready for their next use in a hygienic way. By following these steps, you are actively working to keep your brushes clean and your family safe from future infestations, which is a big relief, really.
Keeping Lice Away: Regular Brush Care
Beyond dealing with an active infestation, maintaining good hygiene practices for your hairbrushes is key to preventing future lice problems. It's not just about what you do after a lice scare; it's also about what you do every day, or at least very regularly, to keep things clean. This kind of routine care can make a big difference, you know.
Cleaning your brushes regularly, even when there's no lice scare, helps remove accumulated hair, dust, skin cells, and product buildup. This general cleanliness makes the brushes less appealing to lice, should they ever come near. Plus, a clean brush just works better for your hair, which is a nice bonus, too.
Consider making a habit of removing hair from your brushes after every few uses, or at least once a week. A quick pluck or a run-through with a comb can keep them clear. Then, perhaps once a month, give them a mini hot water and soap bath, similar to the sanitizing process. This consistent care keeps them in top shape and reduces the chances of anything unwanted taking up residence, honestly.
By following these simple steps and maintaining good hygiene practices, you can significantly reduce the risk of re-infestation and keep your hair tools clean and safe for everyone. It's a small effort that yields big peace of mind, which is something we all value, isn't it?
Frequently Asked Questions About Lice and Brushes
How long can lice live on a hairbrush?
Lice are very dependent on human blood for survival. They typically cannot live for very long once they are off a person's head. On surfaces like hairbrushes, lice can usually survive for up to 48 hours. This means they have about two days to find a new host before they weaken and die. That's why cleaning brushes within this timeframe is so important, you know, to break the cycle.
Nits, which are lice eggs, are even more resilient in some ways because they are glued firmly to hair strands. However, once those hair strands are removed from the head and not kept at body temperature, the nits are unlikely to hatch. The hot water method helps ensure that any eggs present on removed hair or stuck to bristles are killed, too, so they can't develop into new lice.
So, while the adult lice have a limited lifespan off the head, the possibility of eggs or even weak lice remaining on a brush for a couple of days makes thorough cleaning absolutely essential. It's about being proactive and removing any potential threat, which is a good approach to take, really.
Does hot water kill lice and nits on brushes?
Yes, soaking your hairbrushes in hot water can kill lice and nits effectively. This is one of the most reliable and simple methods for sanitizing brushes after a lice infestation. Lice and their eggs are very vulnerable to high temperatures, and exposing them to sufficient heat will eliminate them. It's a very straightforward and accessible solution for most households, honestly.
The heat essentially dehydrates and damages the internal systems of the lice, leading to their demise. For nits, the heat denatures the proteins within the egg, preventing them from hatching. This means you're tackling both the live insects and the potential future generation of lice, which is pretty comprehensive.
This method is widely recommended because it's non-toxic and uses something readily available in most homes. It's a very effective way to ensure that your brushes are no longer a source of re-infestation. Just make sure the water is hot enough, and you let the brushes soak for the recommended time, you know, for the best results.
What temperature kills lice on brushes?
To effectively kill lice and nits on hairbrushes, you should use water that’s at least 130°F (54°C). This temperature has been identified as the minimum necessary to ensure the demise of both adult lice and their eggs. Water cooler than this might not be sufficient to do the job thoroughly, which is something to keep in mind, of course.
You can achieve this temperature by using the hottest setting on your tap, or by heating water on the stove and carefully pouring it into a sink or basin. Always use caution when handling very hot water to avoid burns. A kitchen thermometer can be helpful if you want to be very precise with the temperature, too.
Soaking the brushes in water at or above 130°F (54°C) for at least 5 to 10 minutes is crucial. This duration allows the heat to fully penetrate the bristles and any trapped hair, ensuring that all lice and nits are exposed to the lethal temperature. It’s a pretty reliable way to make sure your brushes are truly clean and safe to use again.
Learn more about lice prevention on our site, and link to this page for more hair care tips.

:max_bytes(150000):strip_icc()/how-to-clean-hair-brush-6745853-06-a92d9270ca574745825643b553ae3fd1.jpg)
Detail Author:
- Name : Ivah Padberg
- Username : edwina.oberbrunner
- Email : megane03@gmail.com
- Birthdate : 1970-11-05
- Address : 31814 Pfannerstill Pine Apt. 135 New Meggie, KS 29188
- Phone : +17148591143
- Company : Corwin and Sons
- Job : Statistical Assistant
- Bio : Id quos dolores voluptas pariatur nisi ipsam. Laborum dolorem ad fugiat. Sint dolorum eum rem. Quia voluptates facere eos cumque excepturi. Veniam labore molestias nemo. Ea sint optio odio magnam.
Socials
twitter:
- url : https://twitter.com/tomasa_official
- username : tomasa_official
- bio : Animi assumenda qui illo. Dolore possimus excepturi architecto temporibus iusto voluptatem numquam maxime. Reiciendis est enim aut labore impedit tempora.
- followers : 3647
- following : 2359
instagram:
- url : https://instagram.com/thoeger
- username : thoeger
- bio : Beatae repellat excepturi nam mollitia sit inventore. Suscipit nam et dolorem commodi.
- followers : 4895
- following : 733
facebook:
- url : https://facebook.com/tomasa.hoeger
- username : tomasa.hoeger
- bio : Dolores debitis sed maiores incidunt iusto assumenda facere pariatur.
- followers : 4688
- following : 2256
tiktok:
- url : https://tiktok.com/@thoeger
- username : thoeger
- bio : Error tempore quasi ad sint.
- followers : 495
- following : 1045
