
Have you ever found yourself reaching for something light, something truly crisp, to go with your favorite dip or a bit of cheese? That, you know, satisfying crunch that just makes a simple snack feel, well, special? For many, the answer often points to Melba toast. This isn't just any ordinary piece of dried bread; it's a timeless kitchen marvel, offering a perfectly sturdy and delightfully airy base for nearly anything you can imagine. It’s a very humble food, yet it brings so much to the table, literally.
Melba toast, in a way, brings a touch of old-world charm to your snack time. It's surprisingly simple to make at home, and once you get the hang of it, you might find yourself making batches regularly. There's something rather satisfying about transforming a plain loaf of bread into these slender, golden crisps. It's a fantastic way to use up bread that's a little past its prime, too, giving it a completely new life, which is, in fact, quite clever.
This guide will walk you through everything you need to know about creating your own perfect Melba toast right in your kitchen. We’ll cover its interesting story, the simple ingredients, step-by-step instructions for that signature crispness, and even some clever ways to enjoy your homemade creations. So, if you're ready to add a truly versatile and delicious item to your culinary repertoire, let’s get started, shall we?
Table of Contents
- The Story Behind Melba Toast
- Who Was Dame Nellie Melba?
- Why Make Your Own Melba Toast?
- Essential Ingredients for Perfect Melba Toast
- The Ultimate Melba Toast Recipe: Step-by-Step
- Tips for Achieving the Best Melba Toast
- Creative Ways to Enjoy Your Homemade Melba Toast
- Troubleshooting Common Melba Toast Issues
- Frequently Asked Questions About Melba Toast
- Bringing the Classic Back
The Story Behind Melba Toast
The name "Melba" often makes people think of a very famous dessert, Peach Melba. And, you know, there’s a good reason for that connection. Both Peach Melba and Melba toast share their name with the celebrated Australian opera singer, Dame Nellie Melba. It’s a rather interesting bit of culinary history, actually. The famous French chef Auguste Escoffier, a truly legendary figure in the kitchen, created dishes for Dame Nellie Melba. As "My text" tells us, Peach Melba was "created famous french chef auguste escoffier for dame nellie melba." This connection, this naming after a person, is quite a charming detail, isn't it?
The story goes that Dame Nellie Melba was, at one point, feeling a bit unwell and needed a very light, very plain diet. Escoffier, with his incredible skill, reportedly prepared a special, very thin, dried toast for her. This particular toast became known as Melba toast, a nod to the opera star who inspired its creation. So, in a way, it was born out of a need for something simple yet satisfying, and it just stuck around. It's pretty cool how a simple request can lead to something so enduring, you know?
Who Was Dame Nellie Melba?
Dame Nellie Melba was a truly remarkable individual, a world-renowned soprano from Australia who captivated audiences with her voice in the late 19th and early 20th centuries. Her influence stretched beyond the stage, clearly, as her name became attached to these iconic food items. She was, in fact, quite the celebrity of her time, and it makes sense that chefs would want to honor her with their creations. It’s a lovely way to remember someone, isn’t it?
| Detail | Information |
|---|---|
| Full Name | Helen Porter Mitchell (later Armstrong) |
| Stage Name | Nellie Melba |
| Born | May 19, 1861 |
| Died | February 23, 1931 |
| Nationality | Australian |
| Profession | Operatic Soprano |
| Known For | Her beautiful voice and inspiring culinary creations like Peach Melba and Melba Toast. |
Why Make Your Own Melba Toast?
Making your own Melba toast offers quite a few advantages over buying it pre-packaged. For one thing, you get to control the ingredients, which is, you know, a big deal for many people. You can pick your favorite type of bread, whether that's a classic white loaf or something with a bit more character, like a whole wheat or sourdough. This means a much fresher taste, something store-bought versions can rarely match, which is actually pretty great.
Beyond taste, there's the sheer satisfaction of creating something so simple yet so perfect with your own hands. It’s a rather budget-friendly option, too, especially if you have bread that's a day or two old and might otherwise go to waste. You’re essentially giving it a new purpose, a delicious one at that. Plus, the aroma that fills your kitchen while it bakes is just, well, it’s inviting and comforting, a really nice bonus.
Homemade Melba toast also allows for customization. You can make it as thin or slightly less thin as you prefer, and you can even experiment with seasonings before the second bake, maybe a little garlic powder or some herbs. This level of personal touch is just not possible with something you pick up from the store. It's about making it exactly how you like your, you know, perfect snack base.
Essential Ingredients for Perfect Melba Toast
The beauty of Melba toast lies in its simplicity. You really don't need much to make it, which is kind of wonderful. The main player, of course, is bread. Beyond that, you might want a little something to help it along, but honestly, it’s mostly about the bread itself. So, let's look at what you’ll typically need, just a few basic things you probably already have around, basically.
- Bread: This is your star ingredient. A standard white sandwich loaf works beautifully, but you can definitely experiment. Slightly stale bread, a day or two old, is often preferred because it’s a bit firmer and easier to slice very thinly. Fresh bread can be a little too soft, making those super thin slices a challenge, you know?
- Optional: Olive Oil or Melted Butter: A very, very light brushing of either of these can add a subtle richness and help with browning, giving it just a little extra something. This is completely optional, though; many people make it perfectly plain.
- Optional: Salt or Other Seasonings: A tiny sprinkle of fine sea salt can really bring out the flavor, especially if you plan to use your Melba toast for savory toppings. You might even consider a little garlic powder or dried herbs if you’re feeling adventurous, though that's kind of getting fancy.
That’s really about it for the ingredients. The magic happens mostly through the careful baking process. It’s a testament to how simple elements, when treated just right, can create something truly special. You don’t need a lot of fuss for something to be really good, which is, frankly, pretty true for many classic recipes.
The Ultimate Melba Toast Recipe: Step-by-Step
Making Melba toast is a two-step baking process, and that's the secret to its signature crispness. It’s not hard, but it does require a little patience and attention to detail. Follow these steps, and you’ll have perfectly brittle, light toast every time, which is, like, the whole point. We’ll break it down into easy, manageable parts, so you can see how it all comes together.
Yields: About 24-30 pieces
Prep time: 10 minutes
Bake time: 30-40 minutes
What You'll Need:
- A loaf of sandwich bread (white, whole wheat, or sourdough work well)
- Baking sheets
- A sharp serrated knife or bread slicer
- Optional: Pastry brush
- Optional: Olive oil or melted butter
Prepping Your Bread
First things first, get your oven ready. Preheat your oven to a moderate temperature, around 300°F (150°C). This lower temperature is important for the first bake because you want to dry out the bread, not toast it immediately. You're aiming for a gentle dehydration here, which is, you know, key to the texture later on. Make sure your oven rack is in the middle position for even heat distribution, which is usually a good idea for baking.
Next, arrange your bread slices on a baking sheet. You want them in a single layer, not overlapping at all. If you’re using optional olive oil or butter, very lightly brush one side of each slice. This is just a tiny amount, basically a whisper of fat, just to help with a bit of color and flavor later. If you skip this, that’s perfectly fine, too; the toast will still be delicious, really.
First Bake: Drying Out
Pop the baking sheet into your preheated oven. Bake for about 15-20 minutes. During this time, the bread should dry out significantly, becoming firm and slightly pale golden around the edges. It won't be crispy yet, but it should feel quite stiff to the touch. This stage is all about removing moisture, which is, you know, what makes it possible for it to get so crisp later. Keep an eye on it; ovens can vary, so your time might be slightly different, naturally.
After this first bake, take the baking sheet out of the oven. The bread slices will be warm and a bit pliable, but definitely drier than when they went in. This is exactly what you want. Let them cool on the baking sheet for a few minutes, just until they are cool enough to handle comfortably. This brief cooling period helps them firm up a bit more before the next step, which is, in fact, quite important.
Cooling and Slicing
Once the bread slices are cool enough to handle, it's time for the crucial slicing step. This is where you create those famously thin pieces. Using a very sharp serrated knife, carefully slice each piece of toast horizontally through the middle, creating two incredibly thin halves. You're aiming for something almost paper-thin, like your, you know, ideal cracker thickness. This takes a steady hand and a good knife, basically.
Some people find it easier to slice the bread *before* the first bake, but doing it after the first bake, when the bread is partially dried, tends to result in thinner, more even slices. The slight firmness from the initial drying makes it less likely to tear. If you have a bread slicer, that would be even better for consistent results. This step is, arguably, the most important for achieving that true Melba toast texture, so take your time.
Second Bake: Getting That Crispness
Now, it’s time for the second bake, where the magic really happens. Reduce your oven temperature to 250°F (120°C). Arrange the newly sliced, very thin halves, cut-side up, back onto your baking sheets in a single layer. Make sure there's plenty of space between each piece for air to circulate, which is, you know, essential for even crisping. This prevents them from steaming instead of drying out properly, which you definitely don't want.
Return the baking sheets to the oven and bake for another 15-20 minutes, or even a little longer. This time, you're looking for them to turn a light golden brown and become truly crisp. They should feel incredibly brittle when you take them out. If they still feel soft in the middle, they need more time. You might need to flip them halfway through for even browning, depending on your oven. Keep a close watch, as they can go from perfectly crisp to burnt very quickly, which is, you know, a bit of a bummer.
Once they're done, take them out of the oven and let them cool completely on the baking sheets or on a wire rack. They will crisp up even more as they cool. The sound of them cooling, that little crackle, is actually quite satisfying. This final cooling stage is just as important as the baking for achieving that signature snap, so don't rush it, really.
Tips for Achieving the Best Melba Toast
Making Melba toast is pretty straightforward, but a few little tricks can make all the difference in getting that absolutely perfect, shatteringly crisp result. These tips are about refining the process, ensuring your efforts lead to the best possible outcome. They're, you know, the small details that add up to something really great.
Choosing Your Bread
While any sandwich bread can work, a standard white loaf is often recommended for its neutral flavor and fine crumb. This allows the crispness to shine without too much interference from the bread's own texture or taste. However, don't be afraid to try other types! A good quality sourdough can make a wonderfully flavorful Melba toast, especially for savory toppings. Whole wheat bread will give you a slightly nuttier flavor and a bit more fiber, which is, you know, a nice touch for some people. The key is to pick a bread that's not too dense or too airy, basically something with a consistent texture.
Using bread that's a day or two old is often better than very fresh bread. Fresh bread can be a bit too soft and moist, making it harder to slice those super thin pieces without tearing. Slightly stale bread holds its shape better, which is, frankly, a huge help for this recipe. If your bread is very fresh, you might consider toasting it lightly in a regular toaster first, just to dry it out a bit before the first bake, which is a pretty good trick.
Slicing Thinly
This is, arguably, the most important step for achieving the classic Melba toast texture. The thinner the slices, the crisper your toast will be. Aim for slices that are almost translucent, if you can manage it. A very sharp serrated knife is your best friend here. Hold the bread firmly and use a sawing motion, letting the knife do the work, rather than pressing down too hard. You want to avoid squishing the bread, which is, you know, something that can happen easily.
If you find slicing difficult, try partially freezing the bread for about 15-20 minutes before slicing. This firms it up just enough to make thin slices easier to manage. You could also use an electric knife if you have one, as they are fantastic for getting consistent, thin slices. Remember, uniformity in thickness means more even baking, which is, in fact, quite important for the final product.
Temperature Matters
The two-stage baking process with different temperatures is crucial. The first, lower temperature bake (around 300°F/150°C) is for drying out the bread slowly and evenly. This prevents it from browning too quickly on the outside while still being moist on the inside. The second, even lower temperature bake (around 250°F/120°C) is for crisping and achieving that light golden color. This gentle heat ensures the remaining moisture evaporates without burning the delicate, thin slices, which is, you know, a common pitfall.
Every oven is a little different, so it's a good idea to know your own oven's quirks. You might want to invest in an oven thermometer to ensure your oven is truly at the temperature you set it to. Also, rotating your baking sheets halfway through each bake can help ensure all pieces toast evenly, especially if your oven has hot spots. This little bit of attention can make a big difference, which is, you know, pretty true for most baking projects.
Storage Secrets
Once your Melba toast is perfectly crisp and completely cooled, proper storage is key to keeping it that way. Humidity is the enemy of crispness. Store your Melba toast in an airtight container at room temperature. A cookie jar with a tight-fitting lid or a resealable plastic bag works wonderfully. This protects it from moisture in the air, which is, you know, what causes it to go soft. You want to keep that satisfying crunch for as long as possible, basically.
Avoid storing it in the refrigerator, as the cool, damp environment can actually make it go stale and soft more quickly. When stored correctly, homemade Melba toast can stay perfectly crisp for up to two weeks, sometimes even longer. If it does lose a bit of its crispness over time, you can often revive it by popping it back into a low oven (around 200°F/90°C) for a few minutes until it's crisp again, which is a pretty handy trick.
Creative Ways to Enjoy Your Homemade Melba Toast
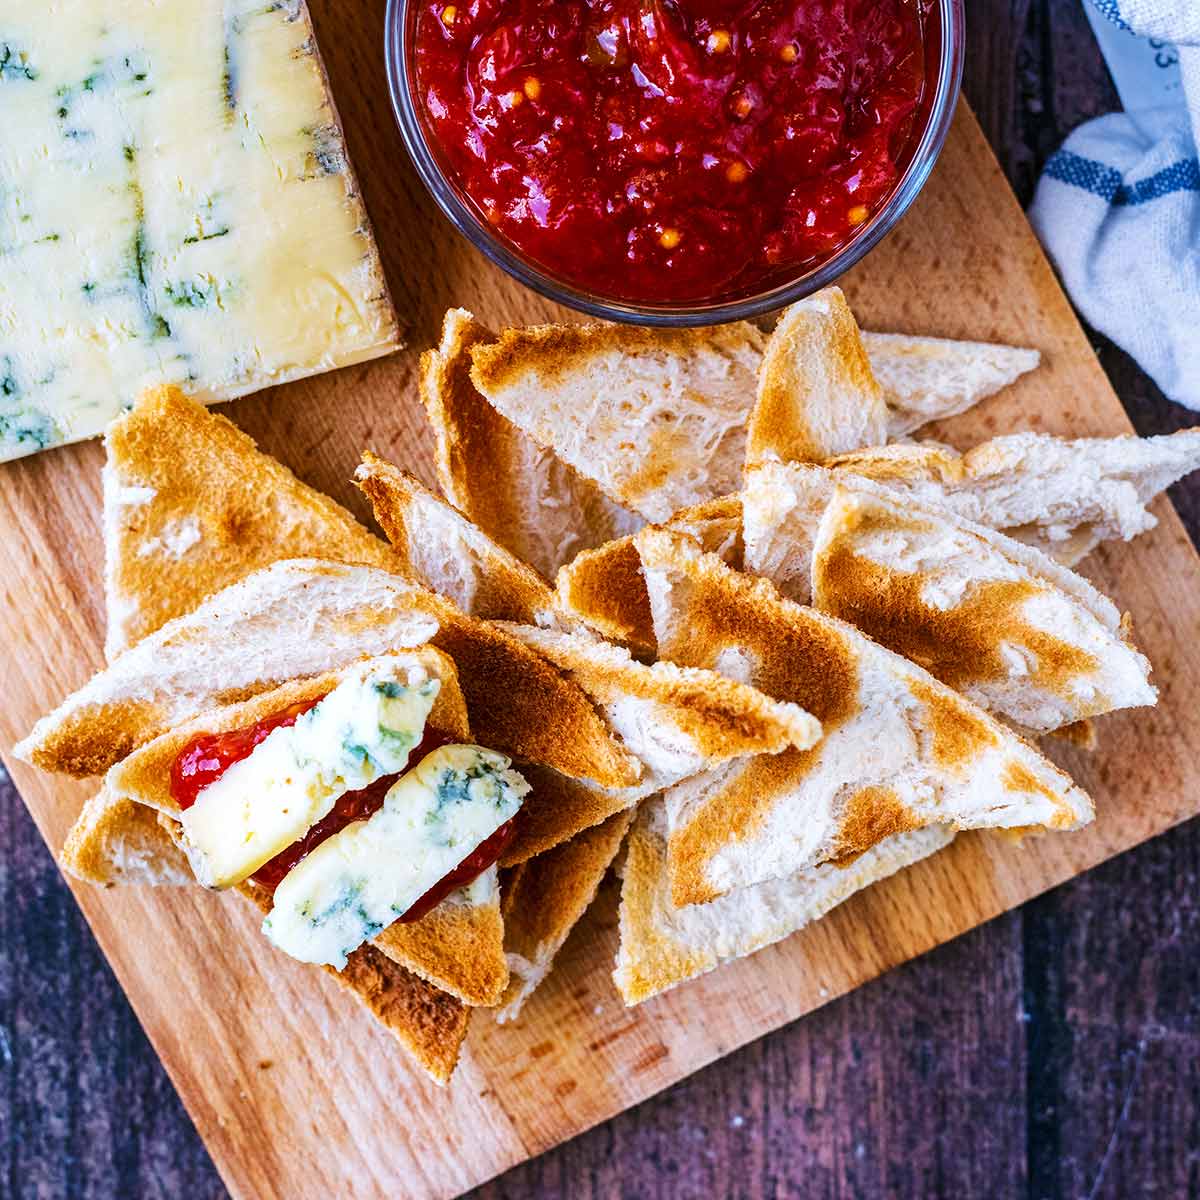
Once you have a batch of fresh, crisp Melba toast, the possibilities for enjoyment are, well, pretty much endless. Its neutral flavor and incredible crispness make it a perfect canvas for both sweet and savory creations. It's a bit like a blank slate, just waiting for your favorite toppings. So, let’s explore some delightful ways to put your homemade toast to good use, you know, beyond just eating it plain, which is also good, honestly.
Sweet Ideas
Melba toast


Detail Author:
- Name : Hailie O'Conner
- Username : llewellyn.johnson
- Email : vladimir06@abbott.com
- Birthdate : 1988-03-01
- Address : 788 Kub Village Apt. 581 New Dorthastad, NH 73617
- Phone : 646.388.5293
- Company : Auer and Sons
- Job : Optometrist
- Bio : Qui dicta consequuntur voluptatem harum et. Soluta in deleniti commodi odio. Sunt dolores quibusdam aperiam qui. Velit esse laudantium soluta voluptatem tenetur rerum unde.
Socials
twitter:
- url : https://twitter.com/elouise.kuhn
- username : elouise.kuhn
- bio : Quasi debitis nulla illum dolorem adipisci reprehenderit. Sunt repellendus earum deserunt sint.
- followers : 1847
- following : 1093
linkedin:
- url : https://linkedin.com/in/elouisekuhn
- username : elouisekuhn
- bio : Consequatur ut autem unde cumque optio.
- followers : 2432
- following : 1840
facebook:
- url : https://facebook.com/elouise_dev
- username : elouise_dev
- bio : Non deserunt nihil nam qui sed nisi non veniam. Adipisci quia sit qui sunt.
- followers : 4250
- following : 2601
