
Have you ever wanted to draw a hand that truly looks alive, even if it's just bones? It's a common desire for many artists, so. Getting the form and movement of a hand right can feel like a big challenge, but learning how to draw a skeleton hand can actually make things much clearer. It helps you see the basic structure, which is really what makes a hand move and hold things.
Learning the inner workings of the hand, those many little bones, can seem a bit much at first, yet it's truly a game-changer for your art. When you grasp the simple pieces that make up a hand's frame, you can then give your drawings a sense of realness. It lets you show how the hand bends and twists, which is pretty cool, you know?
This article is going to walk you through how to create a picture of a skeleton hand that looks just right and feels believable. We'll look at the fundamental parts of the hand's body structure and then show you how to use that information. You'll find a step-by-step drawing guide here, perfect for anyone just starting out, or even if you've tried before and want a fresher approach. Today, October 26, 2023, we're sharing some simple methods to help you get started.
Table of Contents
- Understanding the Hand's Inner Design
- Getting Started with Your Drawing
- Step-by-Step Guide to Drawing a Skeleton Hand
- Common Questions About Drawing Skeleton Hands
- Making Your Skeleton Hand Drawings Even Better
- Your Next Steps in Drawing Skeleton Hands
Understanding the Hand's Inner Design
To really draw a skeleton hand that looks right, you first need a bit of insight into how a real hand is put together, you know? It's like building something; you need to see the frame. The hand is a rather complex structure with many small pieces that all work together. We'll look at these parts in some detail, which is actually very helpful for your drawing.
The hand's ability to move so freely is a direct result of how these pieces connect. Learning about them helps you understand why a hand can hold a pen, wave goodbye, or even make a fist. It's truly about seeing the hidden mechanics, so.
The Wrist and Palm Bones
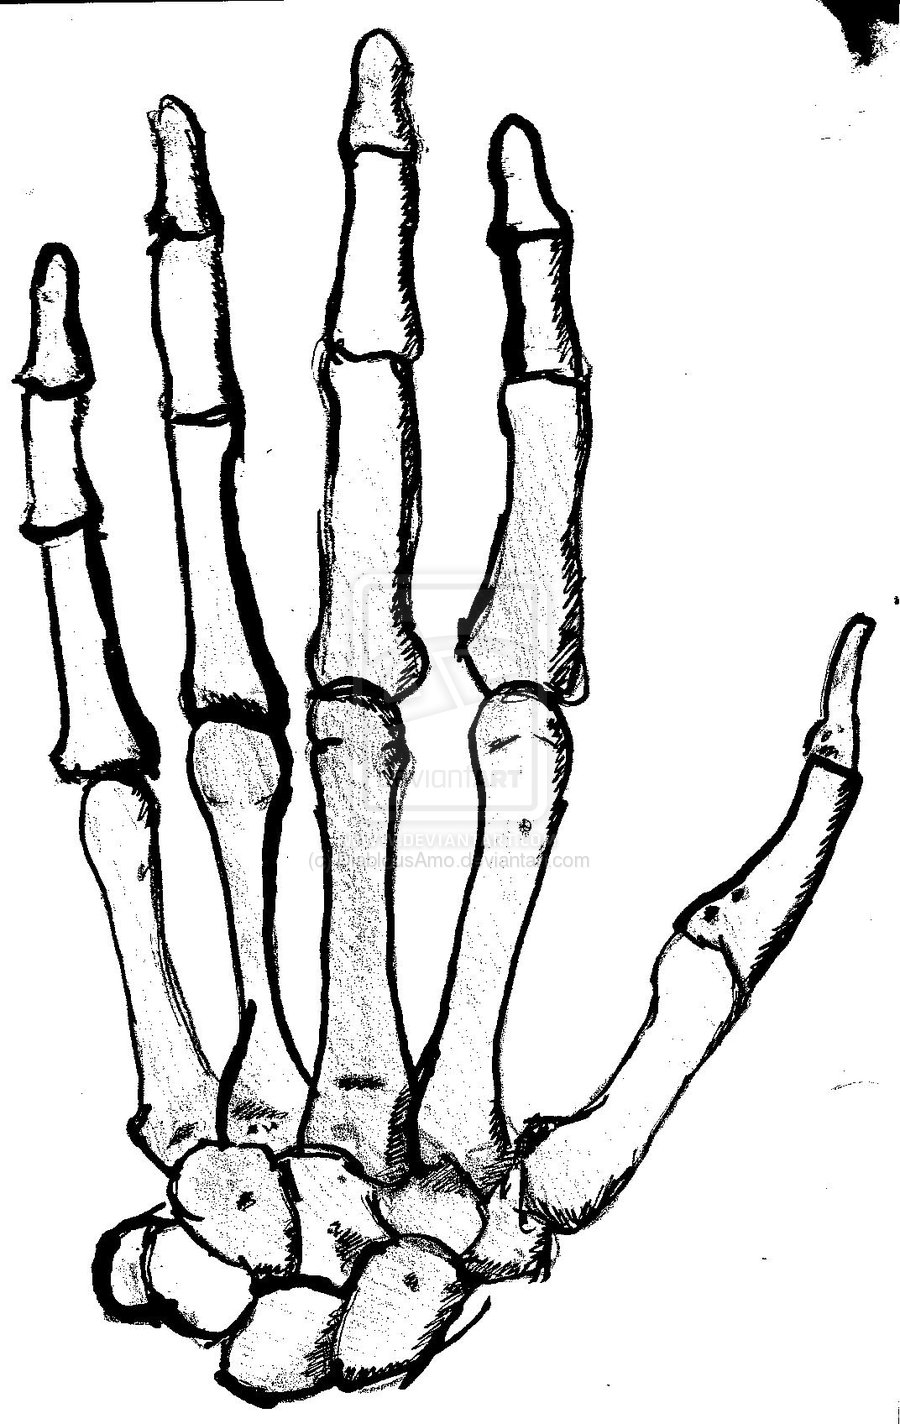
At the base of the hand, where it meets the arm, you have a group of eight small, irregular pieces called carpals. These are arranged in two rows, and they allow for a lot of movement at the wrist. They're pretty important for the hand's flexibility, you see.
From the carpals, five longer pieces extend into the palm. These are the metacarpals. Each one connects to a finger, forming the main body of the hand. They give the palm its general shape, which is quite interesting, really.
The thumb's metacarpal is a bit different from the others. It's shorter and wider, allowing the thumb to move in a special way, separate from the other fingers. This unique setup is what gives the thumb its amazing ability to grasp things, you know, in a very useful way.
When you are drawing, understanding these pieces helps you get the right width and curve of the palm. It also helps you see how the fingers spread out from the hand's center, which is actually pretty vital for a natural look.
The Finger Bones
Each of your fingers, except for the thumb, has three small pieces called phalanges. The thumb, on the other hand, only has two. These are the pieces that make up the individual segments of your fingers, allowing them to bend and curl, so.
The first phalanx is the one closest to the palm, connecting to a metacarpal. Then comes the middle phalanx, and finally, the end phalanx, which is at the very tip of your finger. It's a simple chain, but it's what gives fingers their length and ability to grasp, you know?
These pieces are what give the fingers their distinct shape and length. When drawing, you need to pay attention to how they get smaller as they go towards the tip of the finger. They're not all the same size, which is a common mistake for beginners, actually.
Knowing the number of pieces in each finger helps you draw the right number of joints and segments. This makes your skeleton hand look much more real and less like a stiff stick. It's a pretty basic thing, but it makes a big difference, you see.
Getting Started with Your Drawing
Beginning a skeleton hand drawing can feel like a big project, but it doesn't have to be. The trick is to start with simple shapes and build from there. You want to think about the general form of the hand before getting into the tiny details, you know?
A good way to begin is by lightly sketching the overall shape of the hand you want to draw. Think about its position: is it open, closed, or pointing? This initial outline helps you place everything correctly later on, so it's a very important first step.
Remember, this is a slow-paced guide, perfect for taking your time and really getting each step down. You don't need to rush. Taking it easy helps you focus on accuracy and understanding, which is actually pretty valuable.
Gather your drawing tools: a pencil, an eraser, and some paper. You might also find it helpful to have a picture of a real hand skeleton nearby for reference. This can help you see the shapes and connections more clearly, too it's almost like having a model right there.
Step-by-Step Guide to Drawing a Skeleton Hand
This section will walk you through the process of creating a skeleton hand picture, piece by piece. We'll break it down into easy steps, so you can follow along and make your own perfect skeleton hand. A pro artist shares some ideas here that you can use, which is great, you know?
This is a beginner's guide to skeleton hand drawing, designed to be simple and clear. By following these steps, you can easily draw a perfect skeleton hand. We'll start with the biggest shapes and then work our way to the smaller, more detailed parts, actually.
Step 1: Basic Shapes and Placement
Start by sketching a general shape for the palm area. Think of it as a slightly curved rectangle or a soft trapezoid. This will be the base for your metacarpals. It doesn't need to be perfect, just a light outline to guide you, you know?
Then, lightly sketch a smaller, somewhat oval shape for the wrist area where the carpals will sit. This connects to your palm shape. Make sure these initial shapes are very faint, as you'll be refining them later, so.
Next, indicate the general direction and length of each finger with simple lines. Don't worry about the individual pieces yet. Just get the overall gesture and how spread out the fingers are. This helps you get the hand's pose right from the start, which is pretty important.
Consider the thumb's position at this stage too. It usually sits a bit lower and apart from the other fingers. Its line should show this distinct placement. This first step is all about getting the general feel and placement on your paper, really.
Step 2: Shaping the Palm and Wrist
Now, let's give more form to the palm area. Within your initial palm shape, begin to define the five metacarpal pieces. Think of them as long, somewhat cylindrical shapes that widen slightly at each end. They should fan out from the wrist area, you see.
For the wrist, start to draw in the carpal pieces. Remember there are eight of them, arranged in two rows. You don't need to draw every single one perfectly at this stage, but suggest their presence as a cluster of small, irregular shapes connecting the arm to the metacarpals. This adds a lot of realism, actually.
Pay attention to the slight curve of the hand. The palm isn't perfectly flat; it has a gentle arch. Show this by making your metacarpal shapes follow that curve. This small detail makes a big difference in how real your drawing looks, so.
The thumb's metacarpal, as mentioned, is shorter and sturdier. Make sure to give it that distinct look. This helps separate it visually from the other finger bases, which is actually pretty important for showing the hand's structure.
Step 3: Adding the Finger Pieces
Moving to the fingers, you'll now add the phalanges. For each finger (except the thumb), draw three segments. Start with the one closest to the palm, making it the longest. Then add the middle one, which is a bit shorter, and finally the shortest one at the tip, you know?
For the thumb, remember it only has two segments. Make sure these are also proportional to each other. The first phalanx of the thumb is usually quite substantial, reflecting its strength, so.
Draw these segments as elongated, somewhat cylindrical forms, just like the metacarpals. They should narrow slightly as they go towards the finger tips. This tapering is a natural part of bone structure, which is pretty important to get right.
Think about the joints where these pieces meet. These are typically wider than the middle of the bone. You can lightly sketch these wider areas now, as they will become clearer in the next step. This helps you plan out the full length of each finger, actually.
Step 4: Connecting the Joints and Finer Details
Now it's time to refine the connections between all the pieces. At each joint, where two pieces meet, draw a slightly rounded, knob-like shape. These represent the knuckles and other joint areas. These shapes should look like they fit together, allowing for movement, you know?
Go back over all your bone shapes and make them more defined. Add subtle curves and slight bumps that you'd see on real bones. Bones aren't perfectly straight or smooth; they have character. This is where your drawing really starts to look like a skeleton, so.
Pay attention to the spaces between the bones. These gaps are just as important as the bones themselves, as they define the hand's structure. Make sure these spaces look natural and not too cramped or too wide, which is actually a common thing to miss.
You might want to refer to a detailed anatomy drawing or even a real skeleton picture for this step. Seeing the real thing can help you understand the small bumps and curves that give bones their unique look. It's a very helpful practice, you see.
Step 5: Finishing Touches and Thematic Elements
With the basic structure in place, you can now add depth and character to your skeleton hand. Use shading to give the bones a three-dimensional look. Think about where the light source is coming from and add darker tones to the areas that would be in shadow. This makes the bones pop out from the page, you know?
Add subtle textures to the bones to make them look old or worn. You can use very fine lines or stippling for this. This kind of detail adds a lot of personality to your drawing. It's pretty cool, actually, how much difference a little texture can make.
This is also where you can introduce some thematic elements, if you like. The provided text mentions "cool thematic elements like fallen leaves and a tombstone." You could draw a few scattered leaves around the hand, or perhaps a small, broken piece of a tombstone nearby. These elements can tell a story, so.
You could also think about the background. A simple, dark wash behind the hand can make it stand out even more. Remember, these are just ideas to make your drawing unique. Feel free to explore other themes that speak to you, which is very much encouraged, you see.
Common Questions About Drawing Skeleton Hands
People often have questions when they start drawing skeleton hands. Here are a few common ones, with some thoughts that might help you out.
How do you draw a simple skeleton hand?
To draw a simple skeleton hand, you start with basic shapes like rectangles for the palm and lines for the fingers. Then, you add simple oval shapes for the knuckles. You don't need to draw every tiny bone piece at first. Just focus on getting the general outline and the main segments of the hand and fingers. It's all about building up from simple forms, you know?
What are the bones in a hand skeleton called?
The bones in a hand skeleton have specific names. The wrist has carpals, the palm has metacarpals, and the fingers have phalanges. Each finger has three phalanges, except for the thumb, which has two. Knowing these names isn't strictly necessary for drawing, but it can help you remember the structure and placement of each part, which is pretty neat, actually.
Is drawing hands hard?
Drawing hands, in general, can be a bit tricky for many artists, and drawing skeleton hands is no different. The difficulty comes from the many small pieces and how they move together. However, by breaking it down into smaller, manageable steps and understanding the basic anatomy, it becomes much less challenging. Practice really helps, so don't give up!
Making Your Skeleton Hand Drawings Even Better
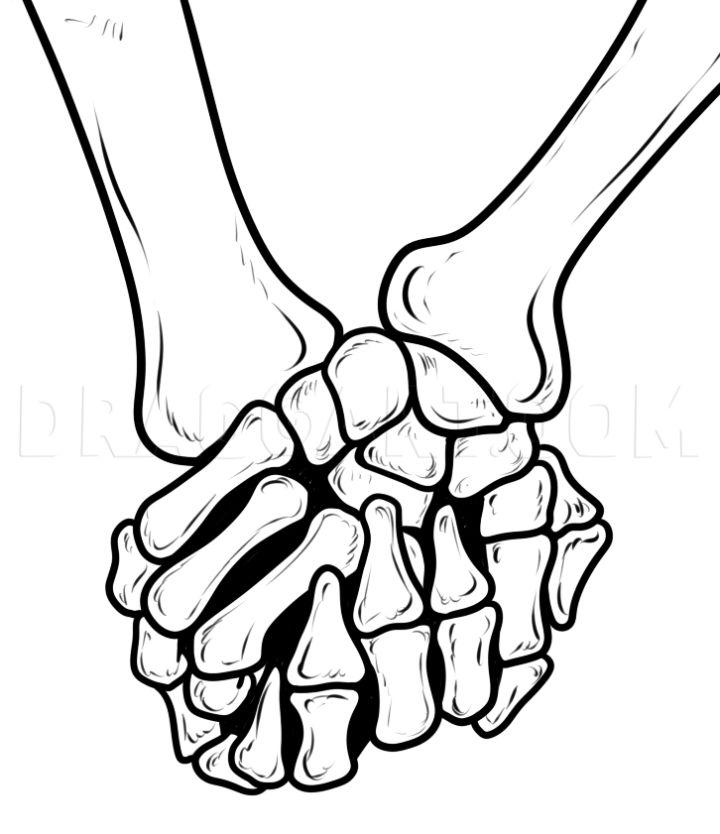
To really make your skeleton hand drawings stand out, consider how the hand interacts with its surroundings. A skeleton hand is a valuable tool for understanding how mobile the hand’s structure is. Think about different poses: grasping, pointing, resting. Each pose will change how the bones appear, you know?
Practice drawing the hand from different angles. Drawing it from the side, from above, or from below will help you understand its three-dimensional form much better. This kind of practice builds your visual library and makes drawing from imagination easier, which is pretty useful, actually.
Don't be afraid to make mistakes. Every line you draw, even the ones you erase, helps you learn. It's part of the process of getting better. You can always try again, and each attempt will teach you something new, so.
Look at real-life references or anatomical diagrams. A good external resource, like a trusted art resource, can provide detailed views of the bones. This helps you see the subtle curves and bumps that make bones look real, which is very important for accuracy, you see.
Your Next Steps in Drawing Skeleton Hands
You've learned how to draw a skeleton hand, following easy drawing instructions and a step-by-step sketch guide. Now, it's about putting that knowledge into practice. The more you draw, the better you'll get at capturing the unique forms of these skeletal structures, you know?
Consider trying out some of the 25 easy skeleton hand drawing ideas. These could include different hand gestures, or adding more cool thematic elements like those fallen leaves and a tombstone mentioned earlier. Each new idea gives you a chance to try something a little different, so.
You can also find printables and coloring pages related to skeleton hands. These can be a fun way to reinforce what you've learned about the bone structure and shading. It's a nice way to practice without the pressure of starting from scratch, which is pretty helpful, actually.
Remember, this is a skill that builds over time. Keep practicing, keep observing, and keep having fun with your art. Learn more about drawing techniques on our site, and for more specific guidance, you can also link to this page for extra tips.

Detail Author:
- Name : Prof. Darien O'Conner DDS
- Username : fleta65
- Email : kertzmann.wava@hotmail.com
- Birthdate : 2005-08-18
- Address : 37188 Konopelski Expressway West Glennie, MD 03542
- Phone : +1.949.606.8813
- Company : Rowe, Wyman and Hickle
- Job : Aerospace Engineer
- Bio : Enim animi itaque dolores incidunt. Quaerat quod reiciendis aut architecto unde voluptas. Harum soluta in aliquam quas delectus harum quam.
Socials
tiktok:
- url : https://tiktok.com/@blanche_altenwerth
- username : blanche_altenwerth
- bio : Corporis reprehenderit iste incidunt. Cum aspernatur voluptatem ducimus aut.
- followers : 6804
- following : 2019
linkedin:
- url : https://linkedin.com/in/blanche_real
- username : blanche_real
- bio : Unde libero atque consectetur dolores non velit.
- followers : 645
- following : 1279
facebook:
- url : https://facebook.com/blanchealtenwerth
- username : blanchealtenwerth
- bio : Ut laboriosam quae quidem maxime aut et sed.
- followers : 6597
- following : 2188
instagram:
- url : https://instagram.com/blanche.altenwerth
- username : blanche.altenwerth
- bio : Quia optio velit architecto temporibus at expedita. Omnis delectus excepturi voluptatem voluptatem.
- followers : 4183
- following : 1823
